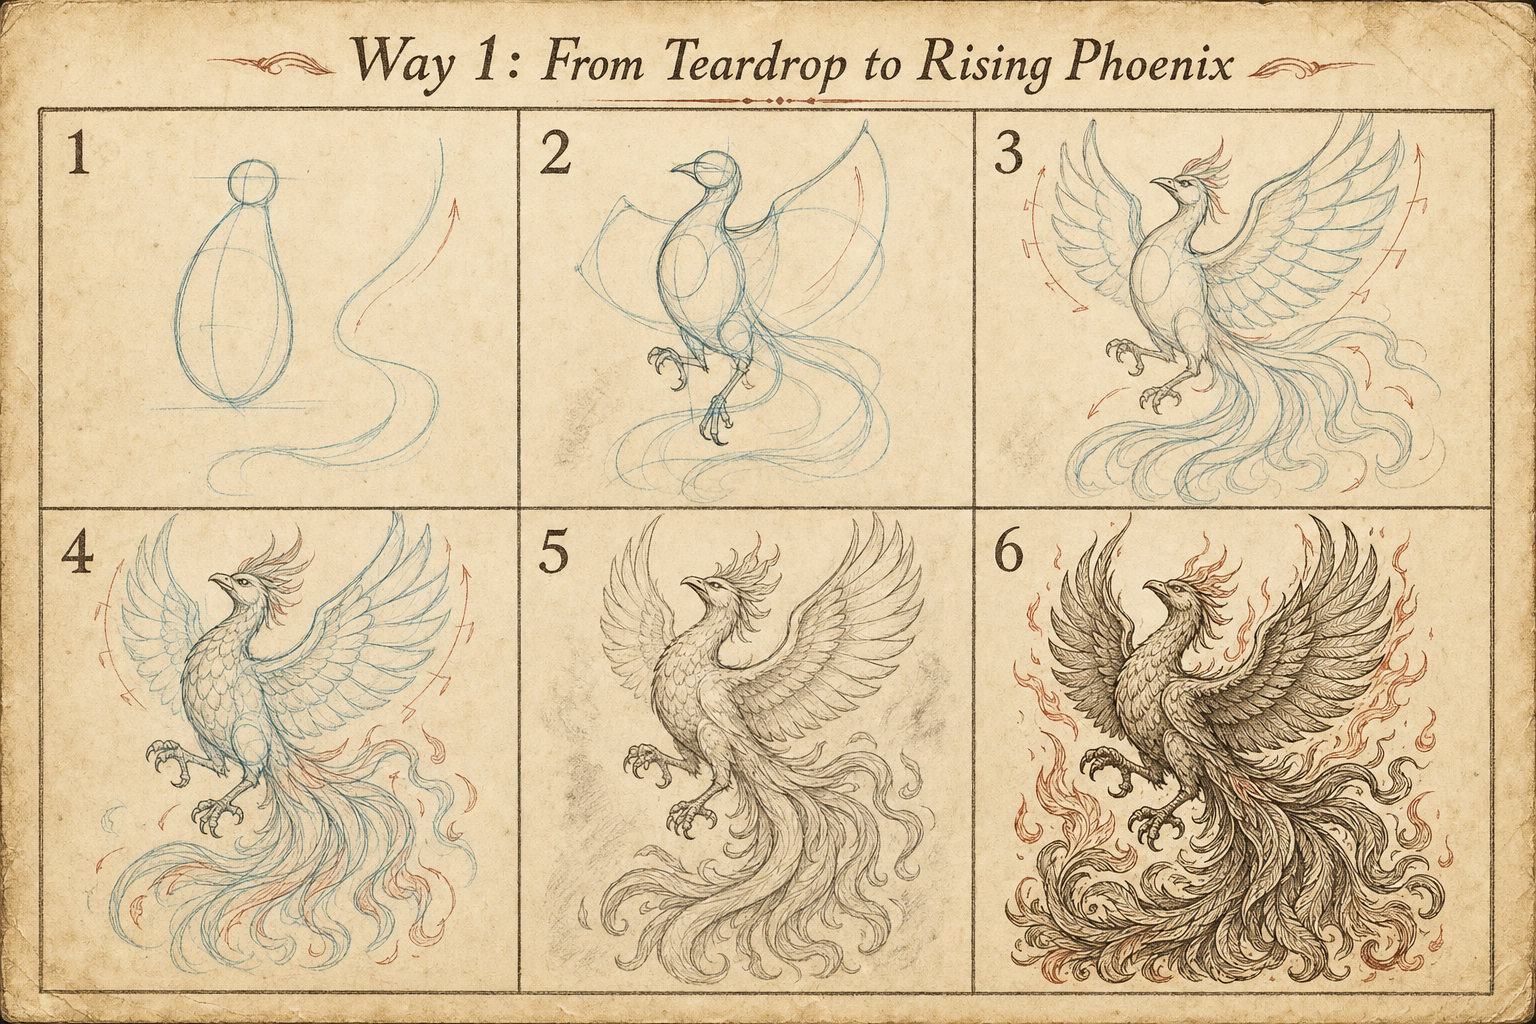
From Teardrop to Rising Phoenix
Start with a teardrop body and flame-tail gesture, then build wings, crest, talons, and an ornate rising phoenix.
Custom six-ways picture book · redone from original prompt grammar
Six complete picture-book drawing tutorial plates. Each image is its own 2×3 six-step process: simple construction geometry → progressively richer structure → finished ornate phoenix.
Format: not one image per step, and not generic fantasy characters. These are six different ways to draw a phoenix, using the recovered vintage instructional-manual style from the original bird plates.
Start with a teardrop body and flame-tail gesture, then build wings, crest, talons, and an ornate rising phoenix.
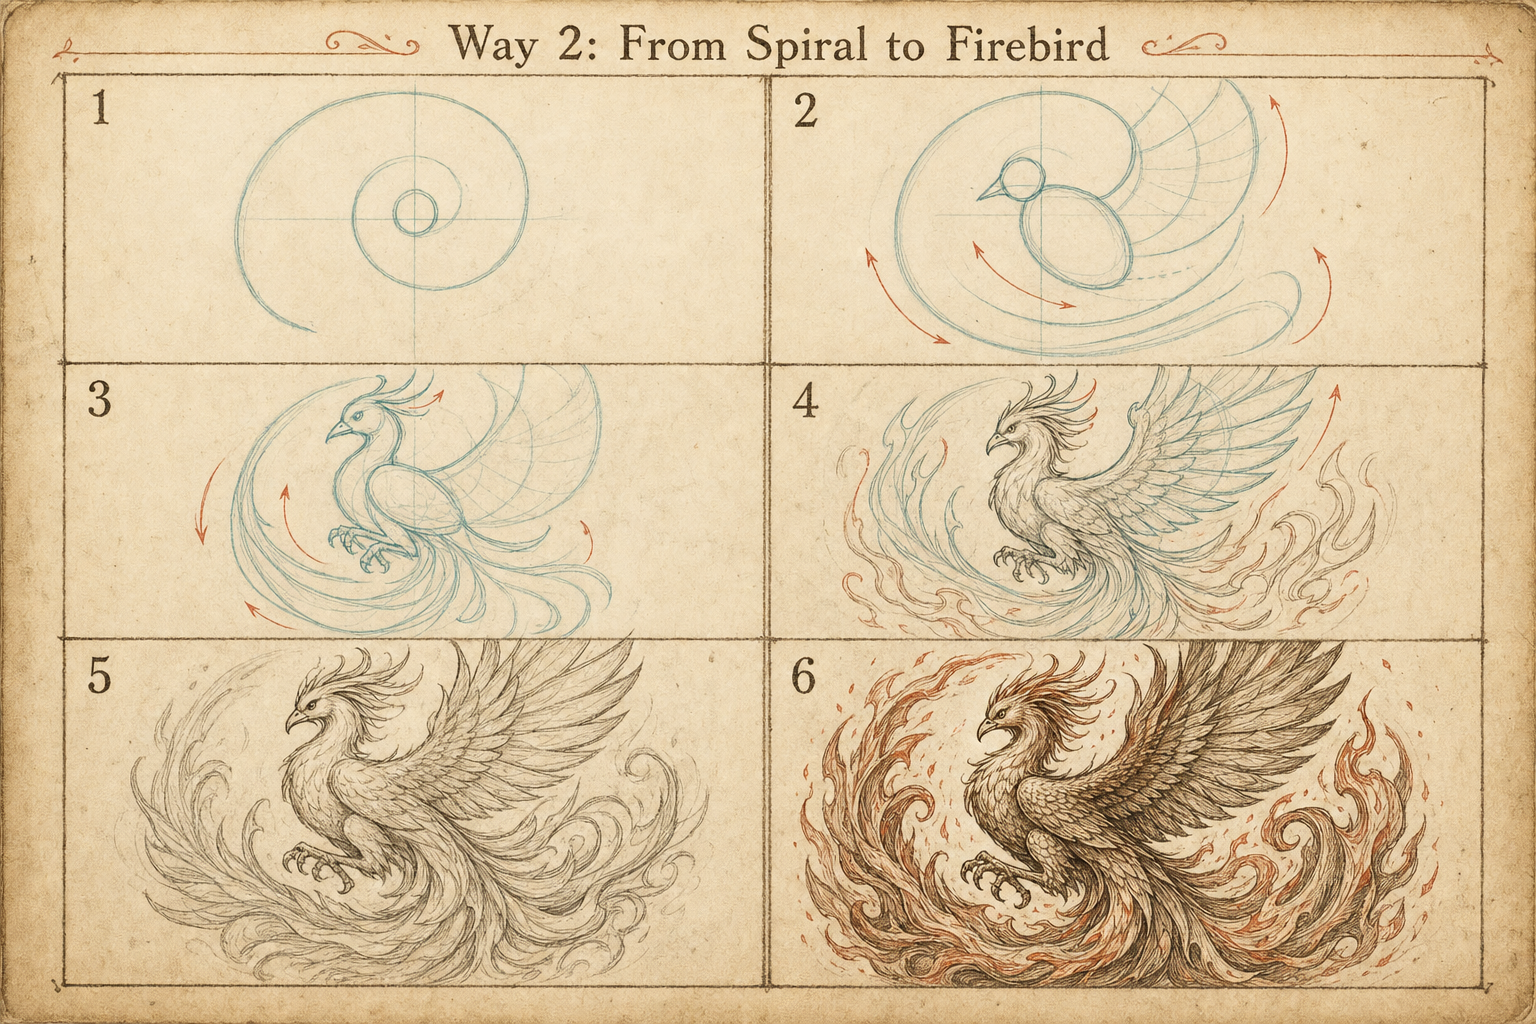
Turn one loose spiral into a curling firebird with flowing tail feathers and flame-like plume rhythm.

Use a fan semicircle as the scaffold for a radiant wing-spread phoenix and tail display.
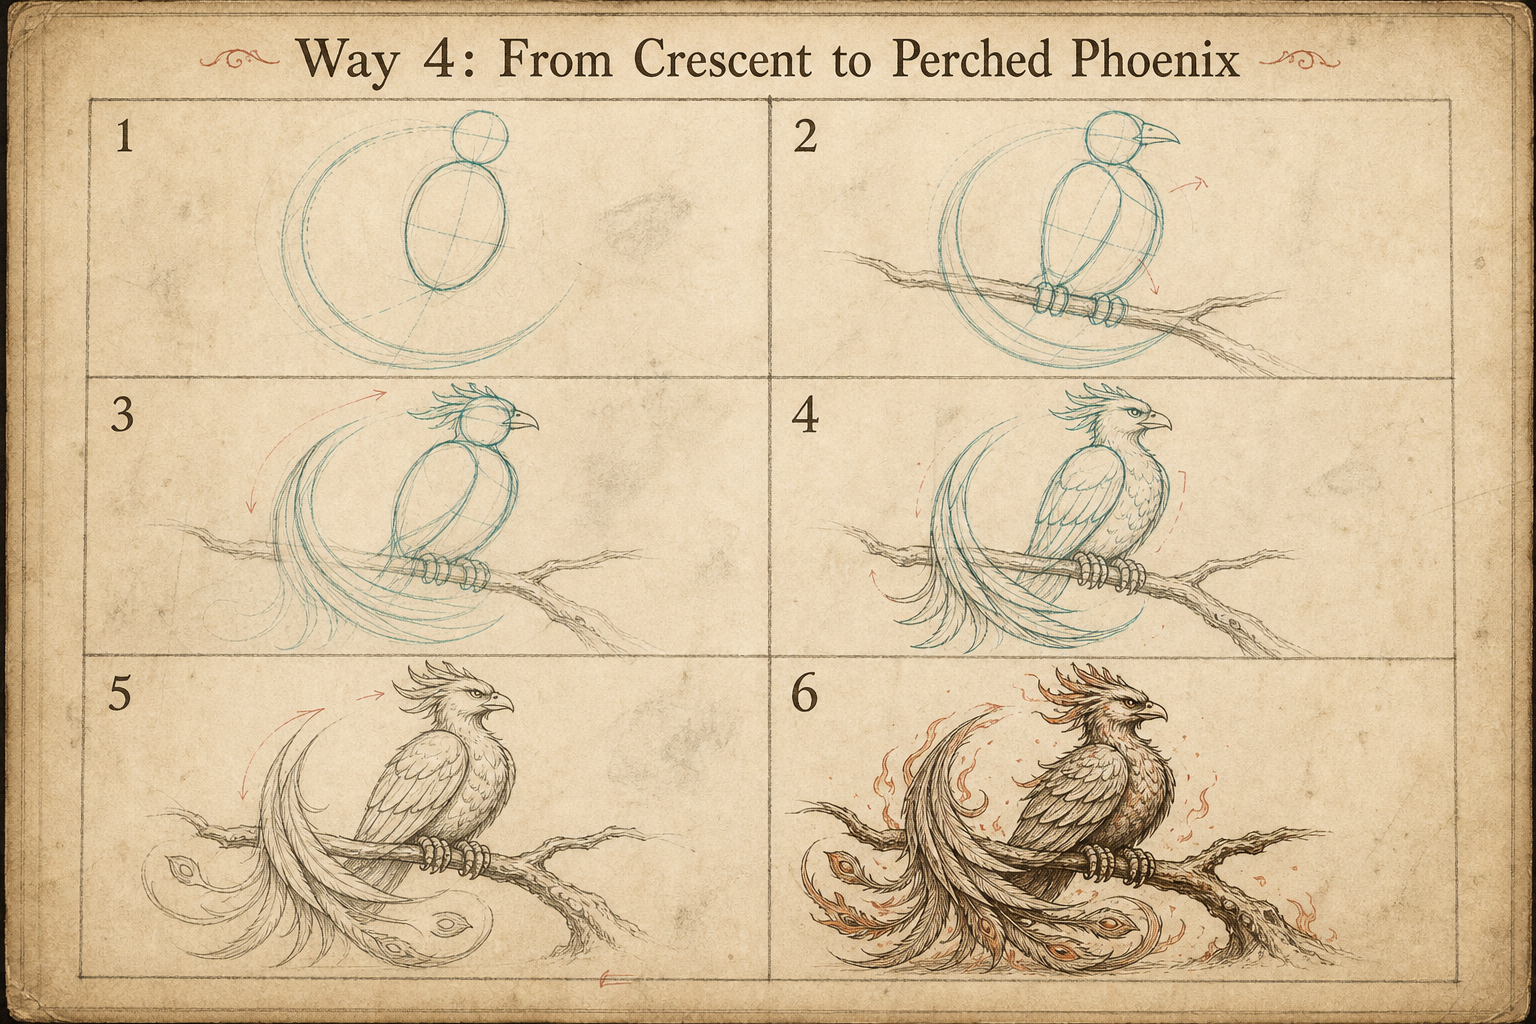
Shape a crescent back and tail into a proud perched phoenix gripping a branch.

Transform diamond geometry into an angular armored phoenix with sharp wings and jewel-like chest structure.
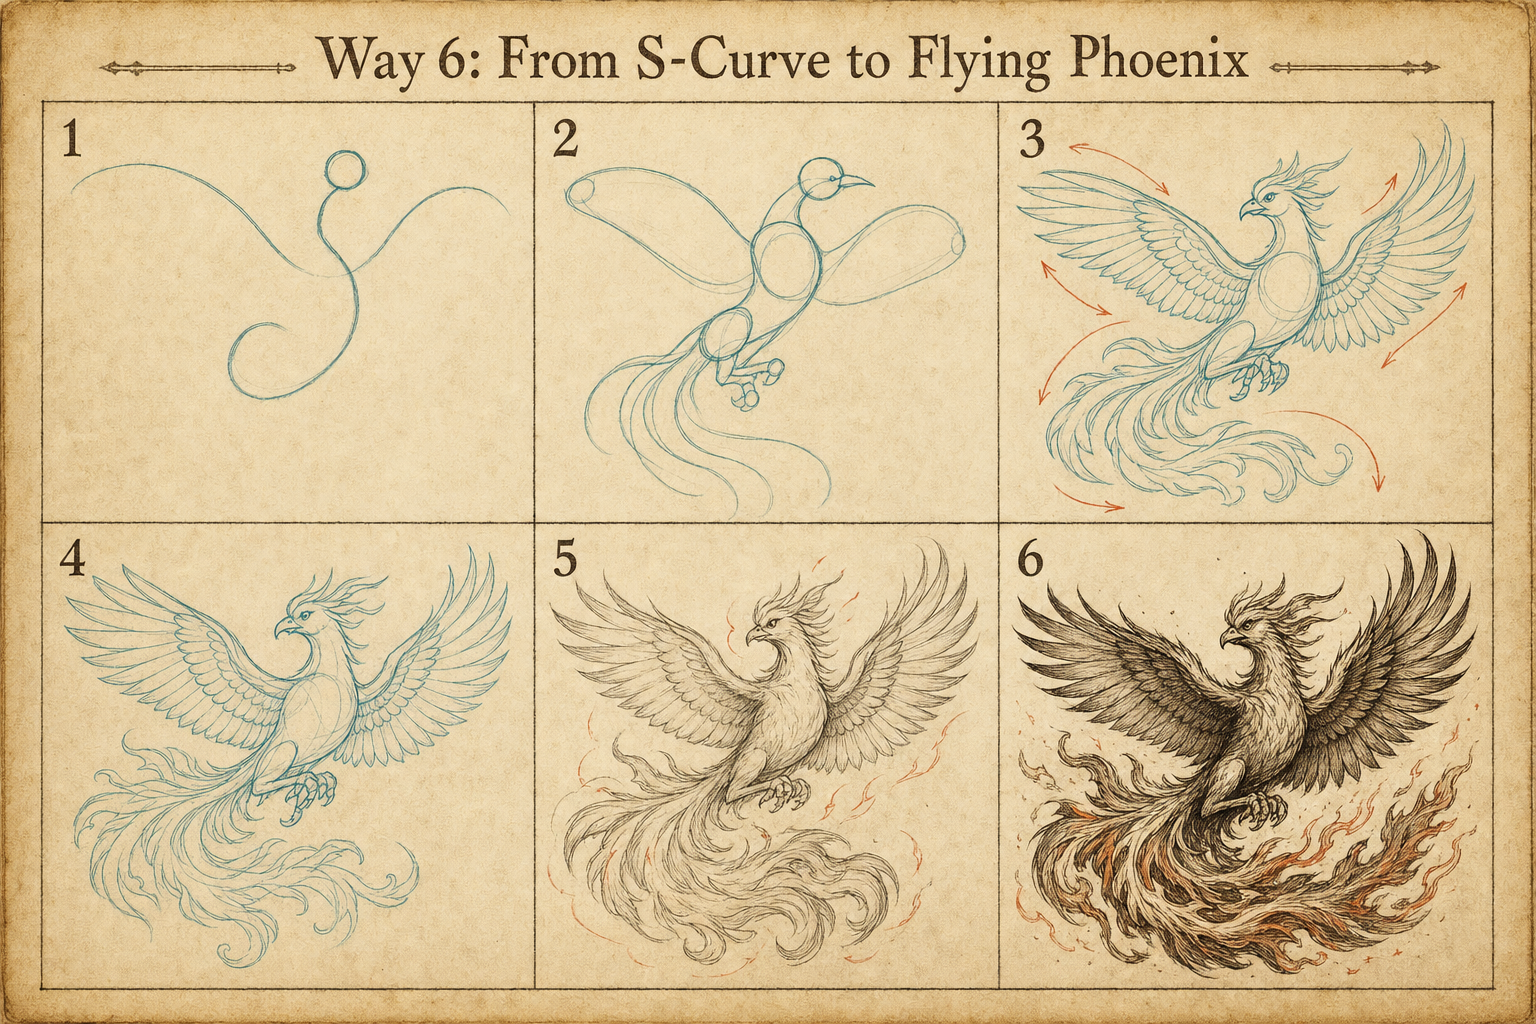
Build a dynamic flying phoenix from an S-curve spine, broad wings, and trailing flame feathers.